How to Build a Simple Deck using Joist Hangers

How to Build a Simple Deck using Joist Hangers
Ground level decks are generally easy to build because they don't usually don't involve installing guard rails and stairs and in some cases permits are not required. If your door is very low to the ground you may not have enough room to install deck framing and decking without excavating. If the bottom of your deck frame is less than 150mm above ground or partially buried you should use pressure treated wood that is rated for ground contact.
The area under decks are always getting wet. There should be enough ventilation for this area to dry, which would provide a longer service life for the deck. Not being able to dry can lead to rot and decay. It is always better to have the perimeter of the deck open for free air to flow below the deck. If you are attaching the deck to your house you will need to install footings below the frost line to anchor the deck and prevent the deck from moving as a result of frost heave.
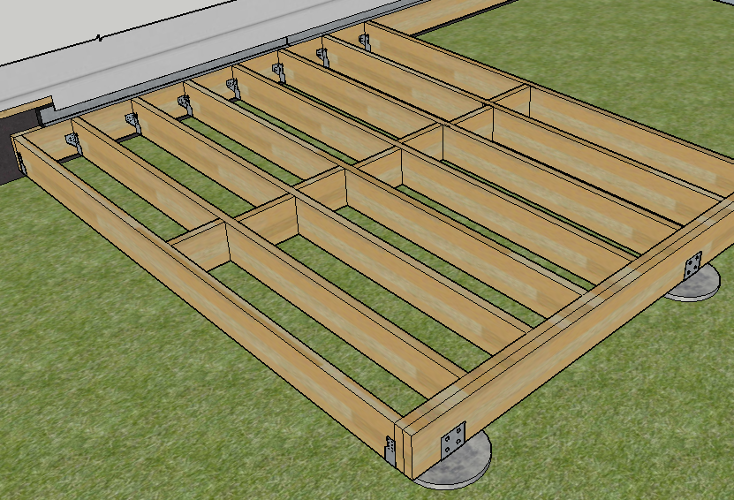
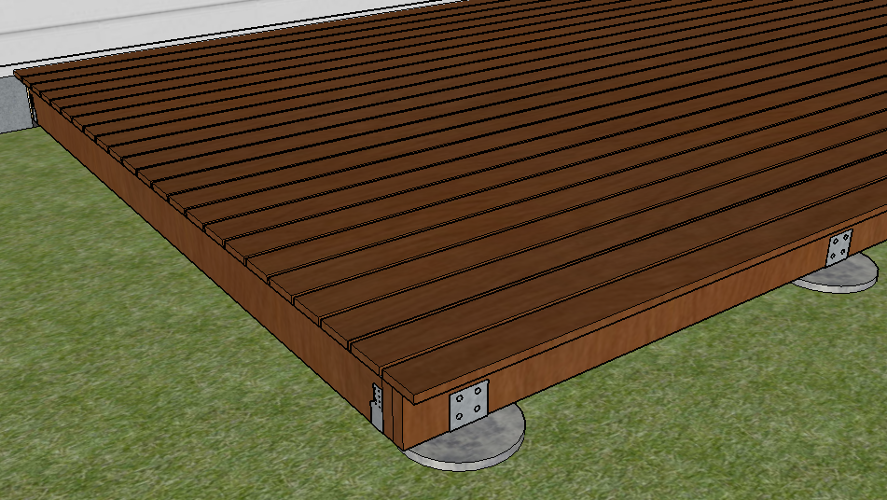
For this example, let's consider that the deck is attached to the house and span is 3.6m. We'd be using structural graded treated timber 47mm x 250mm as the main timber structural element. We'd use two planks to make the perimeter beam (rim beam), the one that's perpendicular to the house wall and for the interior joists we'd use one plank. The wallplate would be also one plank and it would be secured to the wall with bolts in a zigzag pattern.
The post bases would be fixed to the concrete footings and the rim beam would be mounted on to the post bases. The post bases are situated in such a way, so their position would not coincide with the position of the joist hangers. They would be mounted on the wallplate and the rim beam at 400mm centres. The concrete footings can be made in a very simple way; by filling a used can with concrete.
The complete base timber structure, the wallplate, interior joists and the rim beams must be flush with each other, so the deck boards would lie nicely on the structure. Usually the structural grade timber would have one side slightly arched (a crown), install them crown side up.
The wallplate should be protected, which can be done by using a strip waterproof membrane, and over it fixing a metal flashing. The wallplate is fixed to the external wall with bolts. The rim board is made by gluing and nailing two planks together.
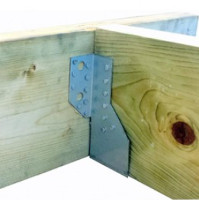
Install bridging between joists at mid span to reduce bounce. You can use scrap framing material for bridging. Stagger the bridging material to provide space for nailing. The bridging material must be flush with the top of the deck frame. Finish the deck by fixing treated deck boards using hot-dipped galvanized or stainless nails. You can use natural pressure treated wood or composite decking.