How to Build an Arris Rail Fence

How to Build an Arris Rail Fence
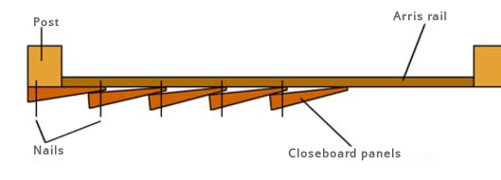
The new fence can enhance your gardens appearance, shelter plants, provide you privacy and security. It can also be used to hide unsightly features, if there are any. The easiest method of constructing rails for board fencing is to have the rails on the front of the posts then fitting the boarding along the whole length. The Arris rails with a triangular cross-section, and cant rails which are more or less rectangular with the top edge sawn at an angle to allow rainwater to run off away from the fence boards are the most commonly used for fence railing. Traditionally Arris rails had tongues cut at their ends which fitted into slots cut in the posts. The tongues took the full weight of the forces on the fence, so they often broke after a time. You can buy online at Insulation Shop various metal accessories that make the fencing work very easy for every one.
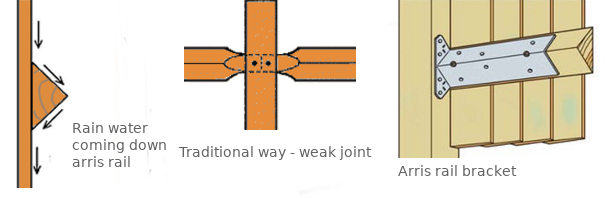
An arris rail is a triangular rail used for closeboard fencing (sometimes described as ship lap or feather board fencing). Traditionally the ends are shaped into tennons in order to fit into mortices set into the fence posts. Usually an arris rail's two sides measure 75mm, the most common length is 3m. Those tennons would carry most of the load and in time would break off. So, it is better to use arris rails without those tennons, and use arris rail brackets, which would take the load and pass it to the post. The cross section of the rail would always be the same.
You will only need basic carpentry skills, if you are building a fence with standard timber posts, arris brackets, post shoes and other accessories, which can be easily bought online. This DIY job would bring you lot of satisfaction and monetary saving. Before starting this job, check with the planning department of your local council, as the height of a boundary fence may be limited. Take special care when installing posts,not to damage underground cabling, pipes or drainage and not to obstruct any underground services.
There are two types of fences posts: timber and concrete. Concrete posts offer a stronger, rot-free, more durable alternative to timber posts, which can stand severe weather conditions. You can use mortice arris brackets to mount arris rails to the concrete post. The tail of the metal bracket will compress and shape itself into the mortise hole in the post as it is hammered in gripping the post tight. The arris rail is then attached to the bracket with screw or nails.
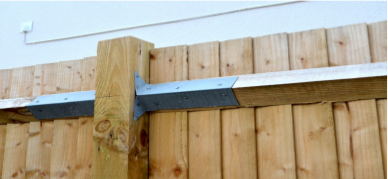
Arris rail bracket for timber posts Arris rail bracket for concrete posts
Timber fence posts are pressure treated and come in a range of lengths. They must be tall enough to accommodate gravel boards and any trellis on top. Fence boards or panels must be securely fixed to their posts to withstand the weather, for which you need a variety of special fencing accessories, which are available at Insulation Shop. Fence boards or panels must be securely fixed to their posts to withstand the weather, for which you need a variety of special fencing accessories. Concrete or timber gravel boards are used give longer life to the fencing timber. The fencing is fitted above the gravel board, so the timber avoids contact with the damp ground. There are special gravel board clips for concrete posts and for timber posts.

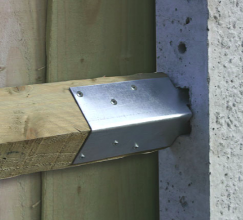
Metal post shoes will extend the life and stability of your fence posts. There are two basic types.
- Fixed bolt down post shoes - more work to put in place than spikes, but will be more stable over time.
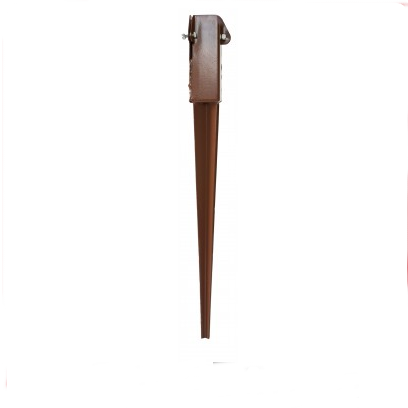
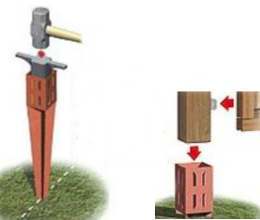
- Spiked post shoes - have a spike that is driven into the ground, with the socket remaining above ground level, along with the post that is clamped into it. Post sockets are driven into the ground with a sledgehammer and a driving tool.
Erecting the fence
- Start by determining the line of the fencing. Bear in mind all posts and fencing must be on your side of the boundary marker.
- Drive in the first post shoe, keeping the clamp facing towards your side of the boundary line. Fit the first post into the socket and secure in place. Use a spirit level to check it is straight.
- Drive in the second post socket. Temporarily prop the first arris rail against the post. Drive in a second post socket at the end of the arris rail aligned with the panel edge. We are using arris rail brackets to fix the rails to the fence post.
- Cut and fit the first gravel board to length to fit horizontally at ground level between the first two post sockets. Secure the gravel board to the post with gravel board clips.
- Repeat the sequence for the remainder of the fencing.
- Fit post caps to each of the posts.
- Coat all the timber with preservative to prolong the life of the fence.