How to make Joist Hanger Installation Fast and Easy

How to make Joist Hanger Installation Fast and Easy
Floors and decks require lot of joist hangers, so the faster and more accurately you can install them, the more time and money you can save. If there is an easier method to preinstall the hangers on the ledger board, beams and rim joist,so you can simply drop each joist in place without having to struggle to hold it in position while attempting to nail it.
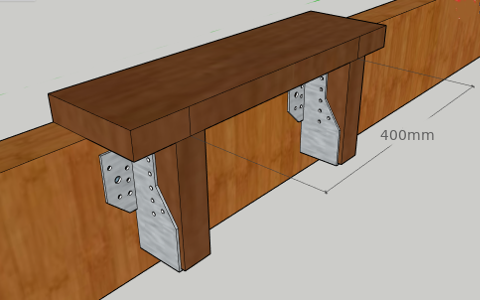
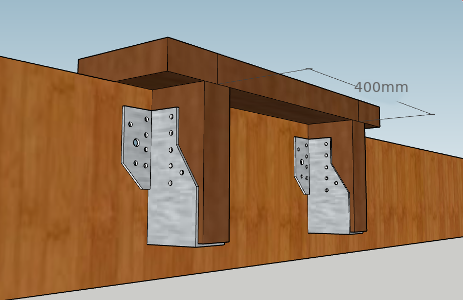
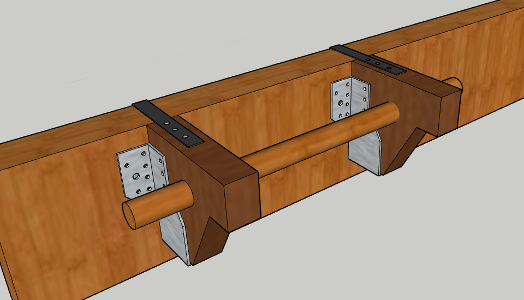
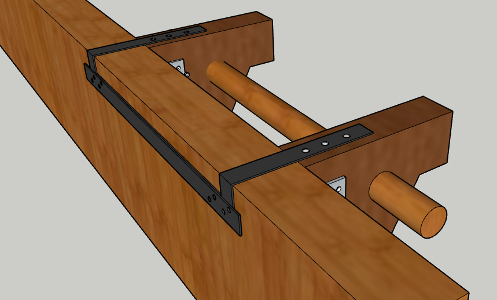
Let's consider that the joists are centred at 400mm. You make jig from scrap timber as shown in the drawing. The two perpendicular timber pieces are cut to match the width of the joists. The top piece eventually can have a short lip for extra clamp area. Once, you know where the first joist is to be, mark the centre and place the jig on top of the beam, push the joist hanger from under, hammer in few nails to keep it in place, then fix the other joist hanger the same way. Then, check if both are on fixed correctly, that is if they are at the same height from the bottom of the beam and if they are vertical. Then move the jig to the 2nd joist hanger and fix the 3rd hanger. Continue this way, until all joist hangers are fixed on opposing sides. Once the joist hangers are mounted, it is quite easy for even one person the place the joists in the hangers. Simply drop them in place.
Advantages
- Joists can be seated hard in their hangers,
- No tacking joists beforehand,
- No eventual gap at the bottom,
- Joist hanger won't get cocked to one side,
- Fast and easy,
- Saves time, therefore money.
Traditionally, first the joists were tacked in place and then the hangers were pushed from the bottom and fixed. Most often there is a gap at the bottom, or the hanger ends up cocked to one side or the other. If you install the hangers first, such problems won't occur. Using a jig would make your work easier.